
 English
 русский
 Español
 عربى
عربى

Content
- 1 How the Compression Molding Process Works
- 2 Essential Equipment for Compression Molding
- 3 Critical Process Parameters
- 4 Compression Molding vs. Transfer Molding vs. Injection Molding
- 5 Common Defects and Troubleshooting
- 6 Mold Design Considerations
- 7 Maintenance and Production Efficiency Tips
- 8 Frequently Asked Questions
Manufacturing rubber seals, gaskets, O-rings, or any molded rubber part means you come across compression molding almost daily. It is the simplest and most direct way to shape a rubber compound into a finished product.
The core conclusion: compression molding uses a heated steel mold and a hydraulic press to force a pre-shaped rubber blank into its final cavity, and repeatable production depends on three factors - consistent compound quality, precise mold design, and controlled process variables.
This guide covers the complete workflow, from compound preparation to finishing, with a practical focus on equipment choices and process control that support stable production.
How the Compression Molding Process Works
Understanding each stage helps you identify where problems start. Compression molding runs through five distinct steps.
- Compound preparation. The base polymer, fillers, plasticizers, and curing agents are blended in an internal mixer or on a mixing mill. The goal is a uniform stock with no unmixed filler agglomerates and no scorched spots. Compound temperature must stay below the scorch point throughout the mixing cycle.
- Preform production. A cold-feed precision preformer extrudes the mixed compound into measured blanks, usually cylindrical or elongated. Blank weight equals the final part volume plus 5-10 percent extra for flash. Accurate preform weight reduces flash variation and prevents short fill in thin sections.
- Mold loading. The preform is manually placed into each cavity of the compression mold. With a multi-cavity tool, operators must position every blank precisely so compound flows evenly when the press closes.
- Pressing and curing. The hydraulic press closes the mold at a controlled speed. Platen pressure compresses the rubber, forcing it into the cavity geometry. Heat from steam or electric platens transfers through the mold into the compound and triggers vulcanization. Proper platen temperature uniformity across the full surface avoids undercured parts near the edges.
- Demolding and finishing. Once the cure time ends, the press opens, and the part is removed. Flash is trimmed manually, processed in a cryogenic deflashing machine, or die cut. Final inspection verifies dimensions, surface finish, and hardness to the part drawing.
Essential Equipment for Compression Molding
Choosing equipment that matches your production volume is the fastest path to consistent quality. Four machines have the greatest impact on daily output.
Vacuum Hot Pressing Machine
Air trapped in the cavity creates micro-porosity in the final part. A vacuum hot pressing machine evacuates the cavity before pressing, so the compound fills complex ribs and thin walls without gas pockets. It is especially effective for O-rings, diaphragms, and parts with sharp details.
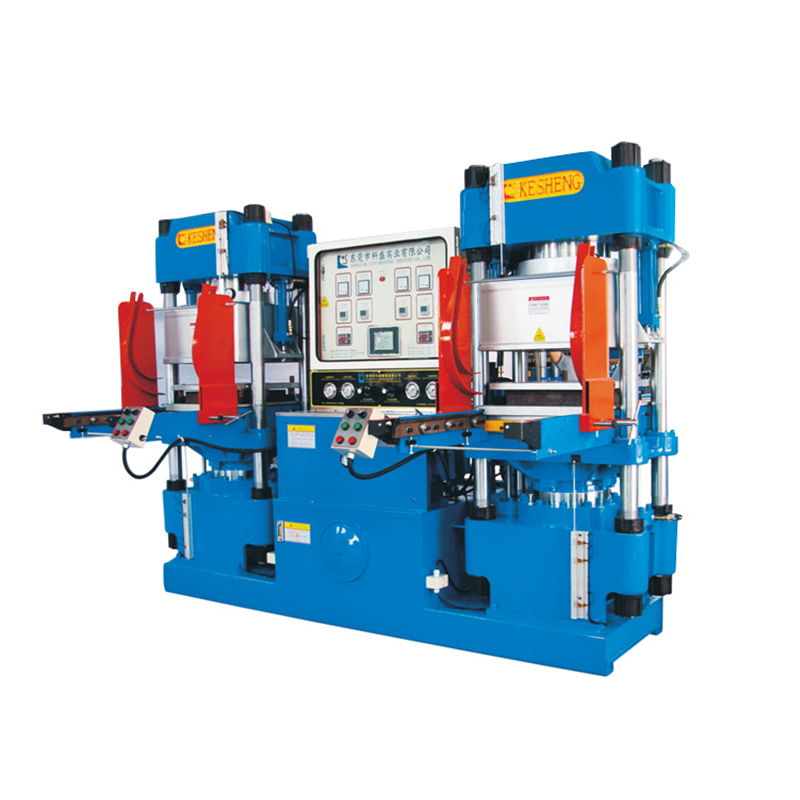 Vacuum Hot-Pressing Machine for Rubber and Plastic PartsThis vulcanizing machine evacuates the cavity before pressing to eliminate air pockets, ensuring dense parts with complex ribs and thin walls. It offers timed mold locking, automatic temperature control, and alarming.View Product →
Cold Feed Precision Preformer
A preformer produces blanks with identical volume and geometry. It removes the manual weigh-and-cut operation, which is a major throughput bottleneck. Consistent blank weight keeps flash within a tight band and cuts compound waste by several percentage points.
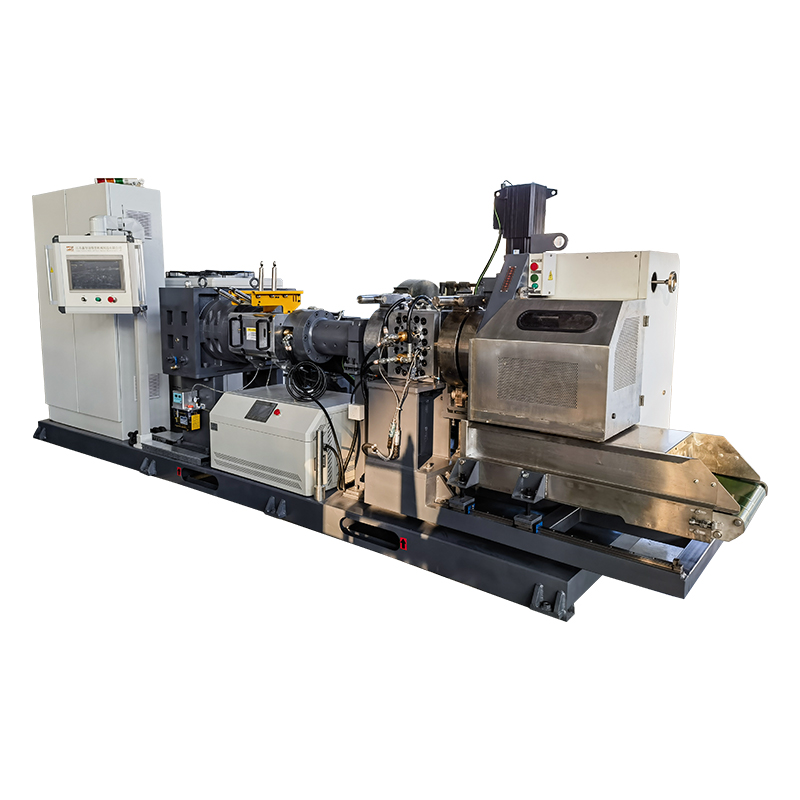 CES Cold Feed Precision Preformer for Accurate Rubber BlanksThis preformer cuts mixed rubber into blanks with weight accuracy under 8‰, suitable for NBR, EPDM, FKM, and more. It combines filtering, extrusion, cutting, and weighing in one unit, improving consistency and reducing waste.View Product →
Pressurized Kneader
Quality begins at mixing. A pressurized kneader compounds polymer, fillers, and additives into a uniform stock while holding the mass temperature in a safe window. Better dispersion reduces batch-to-batch variation and avoids localized undercure from poor mixing.
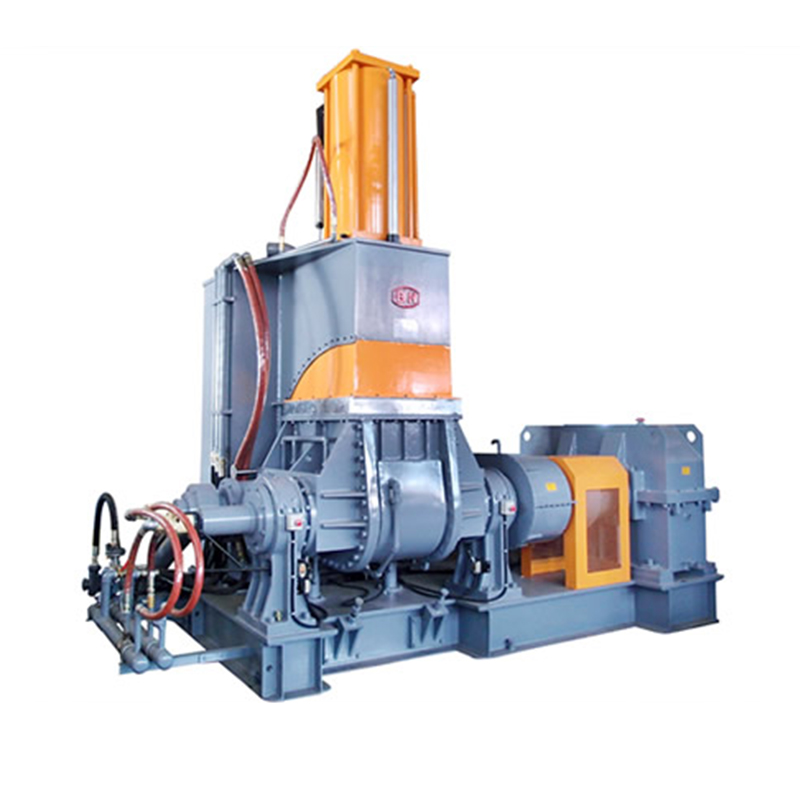 Pressurized Kneader for Rubber and Plastic MixingThis kneader handles plasticizing, mixing, and refining of rubber and plastics, including short fiber compounds. It ensures uniform dispersion and controlled mass temperature, reducing batch variation and undercure risks.View Product →
Cryogenic Deflashing Machine
After curing, flash removal can consume 30-40 percent of production time when done by hand. Cryogenic deflashing embrittles flash with liquid nitrogen, then removes it with a rotating impeller. It works well on O-rings, gaskets, and complex shapes where hand trimming is impractical. This cryogenic deflashing machine supports consistent finishing across high-volume runs.
Critical Process Parameters
Three parameters control the outcome of every compression molding cycle. Knowing where to start saves hours of trial-and-error on the floor.
1Temperature. Most rubber compounds cure between 150°C and 200°C. Running below the low end lengthens cure time and risks incomplete crosslinking. Running above the high end may scorch the compound before the mold fully closes.
2Pressure. Hydraulic pressure typically ranges from 5 to 20 MPa depending on compound hardness and part complexity. Harder compounds need higher pressure to push material into deep ribs. Insufficient pressure shows up as non-fill or missing features.
3Cure time. The dwell time depends on the thickest wall section. A 10 mm thick part may need 15 minutes at 170°C, while a 2 mm part can cure in 3 minutes. Under-curing produces weak physical properties. Over-curing degrades tensile strength and elongation.
| Compound | Temperature | Pressure | Cure time per 5 mm |
|---|---|---|---|
| NBR | 165°C | 10-15 MPa | 7 min |
| EPDM | 170°C | 8-12 MPa | 8 min |
| SBR | 160°C | 10-14 MPa | 6 min |
Compression Molding vs. Transfer Molding vs. Injection Molding
Compression molding is the oldest of the three primary rubber molding methods, but it still holds a strong position on the factory floor. Comparing methods against your product type and volume helps make the right selection.
Compression molding uses simple, low-cost molds. There is no runner system, so material waste stays minimal. It suits high-hardness compounds that do not flow easily. The drawbacks are manual blank loading, longer cycle times, and flash at the parting line.
Transfer molding pushes compound through a runner system into the cavity. It improves detail filling and reduces flash, especially for parts with dense metal inserts. The trade-offs are slight filler orientation, more material waste in the runner, and a higher-cost tool.
Injection molding fully automates feeding and curing. It gives the shortest cycle times, minimal manual handling, and excellent repeatability. The capital cost is much higher, and high-hardness compounds can scorch in the barrel before reaching the mold.
| Method | Mold cost | Cycle time | Flash level | Automation potential |
|---|---|---|---|---|
| Compression | Low | Medium | High | Low |
| Transfer | Medium | Medium | Low | Medium |
| Injection | High | Short | Very low | High |
Common Defects and Troubleshooting
Even with a well-tuned process, defects appear. The ability to fix them fast matters more than avoiding them entirely. Here are the defects you will see most often and the standard corrections.
Non-fill or missing sections. The compound did not reach every cavity detail. Raise the mold temperature slightly, increase pressure, enlarge vents, or reduce the preform weight so material flows more freely.
Blistering. Gas or air remains trapped inside the part. Deepen the vacuum cycle, lower the mold temperature, or adjust preform positioning so the compound does not entrap air in corners.
Excessive flash. Too much material escapes through the flash gap. Reduce the preform weight by 3-5 percent, check that the flash gap does not exceed 0.05 mm, and confirm the press applies even pressure across the full platen.
Porosity around thick sections. Voids near the center of thicker sections come from trapped air or volatile compounds. Switch to a vacuum press, extend the vacuum dwell time, or modify the compound to reduce volatile content.
Sticking and tearing on demold. The part remains in the cavity. Check the mold release coating, verify that cure time is not too short, and slightly increase the draft angle.
Mold Design Considerations
Good mold design prevents most production problems before they occur. Paying attention to these five points during tooling and mold acceptance pays off in lower scrap and fewer cycle interruptions.
- Shrinkage compensation. Rubber compounds shrink 1.5 to 3 percent on cooling. Cavity dimensions must be calculated as the final part size divided by (1 - shrinkage rate). Using the wrong factor gives oversize or undersize parts.
- Flash gap. For standard industrial parts, the flash gap should be 0.02 to 0.05 mm. A wider gap increases flash and trimming cost. A narrower gap may cause the mold halves to bind.
- Venting. Air has to escape as rubber fills the cavity. Vent grooves sit at the deepest fill points and along the parting line. Insufficient venting causes blisters and non-fill at the end of the flow path.
- Draft angle. A draft angle of 1 to 2 degrees on side walls makes the part release cleanly. Undercut features require extra mold complexity and should be avoided unless the part truly requires them.
- Platen alignment. If the upper and lower platens are not parallel, one side of the cavity receives more pressure than the other. Regular alignment checks with feeler gauges prevent uneven flash.
Knowing the material properties of your compound is a prerequisite for choosing the correct shrinkage factor and mold steel.
Maintenance and Production Efficiency Tips
Preventive maintenance keeps compression molding presses running for years. A simple daily, monthly, and quarterly schedule controls costs before they become major repairs.
- Daily platen cleaning. Remove oil, rubber residue, and release agent buildup from the platen surface. A clean platen transfers heat evenly.
- Monthly hydraulic oil check. Inspect the hydraulic oil level and pressure gauge calibration. Erratic pressure is the main cause of uneven flash.
- Quarterly alignment verification. Use feeler gauges or a laser kit to confirm platen parallelism. Replace worn guide bushings when clearance exceeds 0.05 mm.
- Annual heater and thermocouple test. Measure the temperature across the platen with a contact thermometer. A 5°C difference between edge and center requires heater replacement.
- Mold storage. Spray cavities with a rust preventive before storage. Keep molds stacked on a flat, dry surface, never directly on concrete.
Production efficiency also improves when preform weight is controlled with a precision preformer. Consistent blanks mean less flash and fewer non-fill rejects.
Frequently Asked Questions
Do I always need a vacuum press for compression molding?
Not always. Thin, simple parts with good venting often produce well without vacuum. But if you constantly deal with porosity or thick sections, a vacuum hot pressing machine reduces scrap enough to justify the investment.
How long does a typical compression molding cycle take?
It depends on the thickest section. A 2 mm O-ring may cure in 3-5 minutes, while a 30 mm block can take 25-30 minutes. The open, load, and demold time adds another minute or two per cycle.
What is the difference between compression molding and transfer molding?
Compression molding places the compound directly into the cavity before the mold closes. Transfer molding uses a separate chamber to inject compound through a runner. Transfer is better for complex parts with inserts, but compression is simpler and cheaper for flat parts and seals.
Does compound hardness affect the required molding pressure?
Yes. Soft compounds around 40 Shore A flow easily at low pressure. Harder compounds around 80 Shore A need significantly more pressure to fill ridges and undercuts.
How do I prevent flash on a compression molded product?
Keep the preform weight 5-10 percent above the final part weight, make sure the flash gap is 0.02-0.05 mm, and verify even platen pressure. A preformer helps by producing consistent blank weight.
What compounds work best for compression molding?
Most thermoset rubbers work well, including NBR, EPDM, SBR, and silicone. Highly filled or very hard compounds behave well in compression because there is no runner to clog.
How do I reduce cycle time in compression molding?
Use a preformer to speed up loading, switch to a vacuum press to shorten the venting phase, or optimize the cure time with a rheometer test. Preheating the preform also reduces the time the part needs to reach curing temperature.

